
Photo editing is often tedious work — but when you’re applying the same steps to different images, there’s a simple way to save a bit of time (or help you remember a complex edit). Actions store steps, in order, so you can repeat them in just a few clicks on other images. Actions are big time-savers, and not just for single images — they can be used to batch edit photos automatically too, like to add a watermark to a set of photos. While actions simplify the process, there’s a few steps to create them — and to help them work for all images. Watch as Ben Willmore shares how to create actions in Photoshop.
Want to learn everything there is to know about Adobe programs? For a limited time, all Ben Willmore classes are 33% off! Shop Now.
How to create actions in Photoshop
Actions essentially tell the computer to record your steps, so that you can quickly repeat them later. To create or use actions, make sure you have the Actions window open — head up to Window then Actions in the top menu if you don’t see the window.

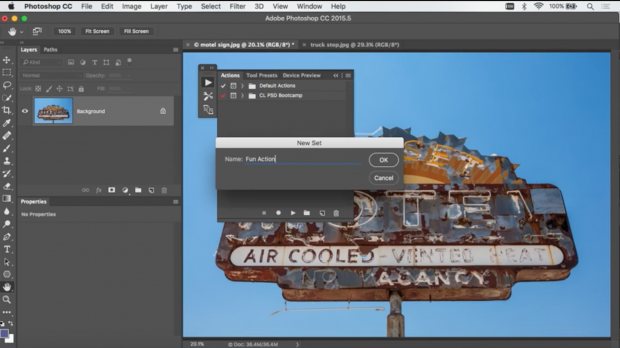
Actions are organized in folders. If you’ve never created actions before, you’ll only see a Default Actions folder, or a few actions that Photoshop includes from the start. To create a new folder to organize your own, click the folder icon in the bottom right of the Actions window, name it then click okay.
At the bottom of the Actions window, you’ll see a set of controls that look an awful lot like the controls on a VCR or voice recorder. The circular record button starts recording your steps while the stop icon tells Photoshop where to end the action set. Pressing play will go through those same steps on another image (or even repeat them on your current image).

Recording an action is simple — Click on the new icon (it’s in between the folder and trash can icons), give your action a name, then click okay. You should see the record icon turn red — which means Photoshop is now recording everything that you do.
Next, simply go through the steps that you would like to record, just like you would normally edit the photo. While recording actions, you use any of the edits you normally would, including edits to the entire image as well as tools (some edits won’t work very well — we’ll discuss how to manage those next). You can even save the image, if you would like Photoshop to save at the end on subsequent images as well.
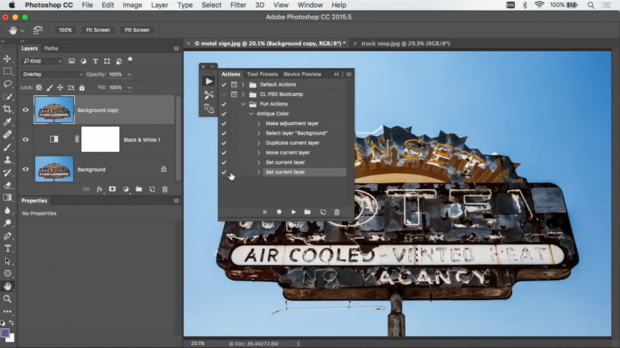
When you’re done, make sure to click the stop button. Then, you can inspect each step in the actions window, clicking on the arrow if you need to see additional details. (You can always test your action by going to File > Revert as well). If you need to add more steps, you can click on the record button again. If you made a mistake, you don’t always have to start over — you can click and drag individual steps to the trash can at the bottom of the Actions window to delete them.
Troubleshooting Photoshop actions
The process of creating Photoshop actions is rather simple — but there are a number of things that could go wrong. Some processes that need to apply to a different part of the image every time — for example, zapping zits with the blemish brush — aren’t good candidates for creating actions.
But, applying an effect to the same area of every image is possible with a little trick. Under the default settings, if you create an adjustment one inch from the edge of the photo — for example, adding a watermark — Photoshop will always do that adjustment one inch from the edge of the photo. But what happens if you are working with a larger photo or use a vertical orientation instead of horizontal? The adjustment won’t be in the same place in relation to the size of the image.
There’s a trick to getting an adjustment to apply to the same general area — before you create the action, change your ruler to percentages. If you tell Photoshop that you want to add a watermark ten percent from the bottom left corner, it will be in the same spot on all images, even vertical ones.

To change the ruler, first, make sure you can actually see your ruler — if not go to Window then Ruler. Then, right click on the ruler (Control-click on a Mac) and click percent. You should see the numbers change to percentages. Now, the action you create will apply to the same area, like the border effect demonstrated in the video.
You can also use actions to batch edit — which is how I usually watermark my images after I’ve finished the individual edits. After saving the action, you’ll select it during the batch edit process to tell Photoshop to apply that action to each image.
Creating actions in Photoshop helps speed up the editing process and is also a good way to complete complex steps that are difficult to remember. Creating an action is fairly straightforward, but there’s some troubleshooting sometimes required, like changing the ruler to percentages for effects on a specific area of the photo.
Are you ready for the biggest Photoshop event of the year? Join CreativeLive for Photoshop Week 2018 to learn how to produce professional quality photos and reach your full creative potential. RSVP Today.


